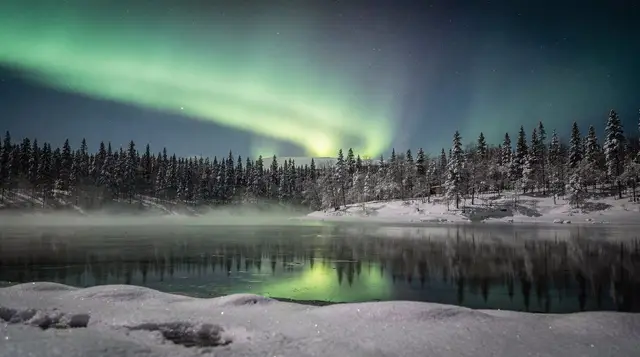
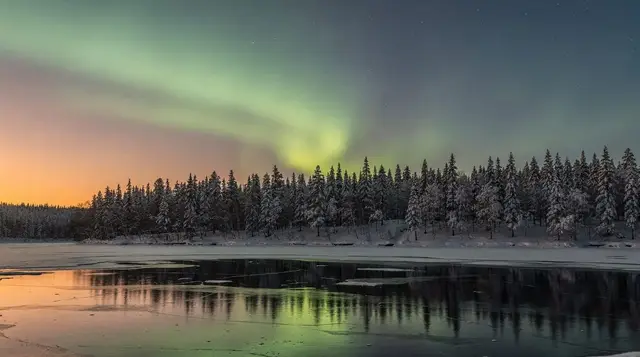
Photographing the northern lights on a smartphone
Can a smartphone actually photograph the northern lights?
Yes, but only in manual or Night Mode with a multi-second exposure set by hand, not in a standard automatic photo mode. Recent phones (roughly the last three to four generations) handle this well; older phones and default auto modes usually return a black frame or a smear of noise. A tripod or another fixed support is as necessary as it is for a camera.
What a phone camera actually sees in the dark
A standard photo mode on a smartphone is built for daylight and indoor light: it exposes for a fraction of a second, relies on autofocus locking onto contrast in the frame, and lets the phone’s software decide how bright to make the result. Point that setup at a dark sky above Rovaniemi and it usually does one of two things: returns a black or near-black frame because the exposure was too short to gather any light, or brightens the little light it did capture into a grainy, colourless smear. Neither result resembles what you were looking at.
The northern lights are genuinely faint compared with almost anything else people photograph at night. Even a bright display puts out far less light than a streetlamp, and the human eye compensates for that in ways a phone sensor does not automatically match. Understanding how the eye differs from a camera explains why the photo on someone’s phone often looks more vivid than what they remember seeing with their own eyes — and why getting a phone to produce that photo takes a deliberate change of settings, not luck.
Turn on manual or Night Mode before you leave
The single most important step happens before you’re standing in a field outside Rovaniemi with cold fingers and a screen you can barely read. Find your phone’s Night Mode, or its Pro, Manual, or Expert camera mode, and practise with it at home in a dark room first. On most recent iPhones this is the built-in Night Mode, which appears automatically in low light and lets you drag a slider to extend the exposure. On most recent Android phones, look for a Pro or Night mode in the camera app that exposes ISO, shutter speed, and focus as separate manual controls.
If your phone’s native app does not offer manual exposure control, several free third-party camera apps add it — worth installing and testing before your trip, not on the night itself, when a slow connection or a blocked app store is the last thing you want to deal with. Whichever route you use, the aim is the same: a shutter speed of several seconds instead of a fraction of one, with the phone completely still for the entire exposure.
This is also where the ceiling on phone photography sits. A phone sensor is a fraction of the size of the sensor in a DSLR or mirrorless camera, and no software mode fully makes up the difference in low light. For anyone serious about the sharpest, cleanest result, a proper camera remains ahead — the guide to photographing the northern lights on a DSLR covers that route in full, and this page deliberately does not duplicate it.
Camera settings that actually work
There is no single perfect setting, because it depends on the phone, the brightness of the display, and how much moonlight or residual light is in the sky. The table below is a starting point to dial in on site, not a fixed recipe.
| Setting | Typical starting point | Why |
|---|---|---|
| Mode | Night Mode or Pro/Manual | Automatic mode will not expose long enough for a dark sky |
| Shutter speed | 3–10 seconds | Long enough to gather light, short enough that a fast-moving aurora doesn’t blur into a flat glow |
| ISO | 800–3200 | Higher gathers more light but adds visible noise; test and check the result on screen |
| Focus | Manual, set to infinity | Autofocus usually hunts and fails in the dark; tap-to-focus on a distant light works as a substitute |
| White balance | Manual, around 3500–4500K | Auto white balance can shift the aurora’s colour unpredictably between shots |
| Flash | Off | It lights nothing more than a few metres away and ruins everyone else’s exposure |
Start with a 5-second exposure at ISO 1600 and adjust from there: if the frame is too dark, raise the ISO or lengthen the shutter speed; if the aurora looks like a flat wall of light with no structure, shorten the shutter speed so the movement of the display is still visible. A fast, active aurora photographs better at 3 to 4 seconds; a faint, slow-moving band can take the full 10 seconds to register at all.
A tripod or stable support is not optional
This is the point most first-time smartphone photographers underestimate, expecting a phone — being smaller and lighter than a camera — to need less support. It needs the same support. A 5-second handheld exposure will show visible blur from hand tremor alone, on any device. The rule is identical to the one that applies to a DSLR, covered in the note on the tripod mistake that ruins otherwise good aurora photos: if the exposure is longer than roughly half a second, the camera needs to be resting on something that isn’t your hands.
A compact travel tripod with a phone clamp is the straightforward answer and packs down small enough to carry in a day bag. Failing that, a beanbag or rolled-up glove on a car roof, a fence post, a snowbank pressed firm, or even the ground with the phone propped at an angle all work in a pinch. What doesn’t work is holding the phone out and pressing the shutter, however steady you think your hands are — cold hands shake more than warm ones, and the shutter tap itself introduces movement.
Most phones also let you set a timer or use a Bluetooth remote or the volume-button shutter on a paired accessory, both of which remove the small jolt of tapping the screen directly. If neither is available, a 2 or 3-second timer does the same job.
What the cold does to your phone
Lithium-ion batteries lose real capacity as temperature drops, and this matters more in Lapland than almost anywhere else most visitors have photographed. A phone reading 50 percent charge at room temperature can drop to single digits, or switch itself off entirely, within 10 to 15 minutes at minus 15 to minus 25°C — the range Rovaniemi sits in for much of December to March. The battery isn’t actually damaged in most cases; it recovers charge once it warms back up, but that is no help mid-tour.
The practical fix is simple: keep the phone in an inside jacket pocket, close to your body, between shots rather than mounted on the tripod continuously. Pull it out, compose and shoot, and put it back. A spare battery pack kept in the same inside pocket (not in an outer pocket or bag, where it cools just as fast) is worth carrying on any aurora night longer than an hour. Touchscreens also respond poorly to thick gloves — thin liner gloves under mittens let you operate the phone without bare fingers in the cold for more than a few seconds at a time.
Smartphone versus DSLR: an honest comparison
Neither option is wrong; they suit different expectations.
| Smartphone (Night Mode/manual) | DSLR or mirrorless with wide fast lens | |
|---|---|---|
| Sensor size | Small; struggles in very low light | Much larger; gathers more light per second |
| Typical result on a strong aurora | Usable, shareable, some visible noise | Sharp, detailed, cleaner colour |
| Typical result on a faint aurora | Often flat or noisy | Still records real structure and colour |
| Setup needed | Night Mode/manual app, tripod, patience | Manual exposure, wide fast lens, tripod, patience |
| Learning curve | Low to moderate | Moderate to steep |
| What it’s genuinely good for | Quick, good-enough shots without extra gear | The best possible image quality |
A phone in the right mode, on a tripod, with the settings above, will produce a photograph that looks recognisably like the aurora you saw and is perfectly good to share. It will not match a proper camera in a faint or fast display, and pretending otherwise sets up disappointment. If image quality matters more to you than convenience, renting or borrowing a camera for the trip and following the DSLR aurora photography guide is worth the extra weight in the bag.
Composing a photo worth keeping
Technical settings get a usable exposure; composition is what makes the result worth looking at twice. An aurora filling an otherwise empty frame gets old quickly across a phone full of near-identical shots. Include something on the ground — a treeline, the outline of a fell, a frozen lake’s edge, a person standing still — to give the image scale and a sense of place. Rovaniemi’s flat, open surroundings mean a low horizon and a wide sky usually work better than trying to frame something tall.
A few reliable, easy-to-reach spots around town are covered in the guide to walking aurora spots near Rovaniemi and the roundup of free viewing spots, both useful if you’d rather shoot on foot than drive. If you have a car and want to put real distance between yourself and the city’s light pollution, chasing the lights by car covers the logistics of that approach directly.
Anyone hoping to shoot from a heated glass igloo should read the honest limits first: interior lighting and the dome’s shape and orientation often restrict what actually shows up in a photo from inside, detailed in the glass igloo northern lights guide — it is not the guaranteed vantage point the marketing implies.
Checking whether it’s worth heading out at all
A phone’s manual mode does nothing for you if there’s no aurora to photograph, or if the sky is solid cloud. Before getting cold for nothing, check the forecast apps and tools worth using and, if you’re new to the basics, the primer on how the northern lights actually work and the month-by-month breakdown of the best time to see them. Rovaniemi’s aurora season runs roughly late August to early April, and cloud cover — not solar activity — is usually the deciding factor on any given night.
Apps and accessories worth carrying
A short, genuinely useful kit for smartphone aurora photography: a compact tripod with a phone clamp, a spare battery pack kept warm in an inside pocket, thin touchscreen-compatible liner gloves, a manual camera app installed and tested in advance if your phone’s native app lacks Pro mode, and a cloth to wipe condensation off the lens when moving between a warm car and cold air. None of this is expensive or specialist, and all of it fits in a small bag alongside the thermal layers you’ll already be wearing.
Going with a guide instead of working it out alone
If manual camera settings sound like more fiddling than you want on a cold night, joining a photography-focused tour hands the technical side to someone else. In Rovaniemi itself, a guided city photography walk is a low-key way to practise night settings on streetlit scenes before trying them on a genuinely dark sky, and a private outdoors photo session gets you one-to-one help with framing and settings rather than working it out solo in the dark.
For a dedicated aurora outing, options further from the city put you under darker skies with less light pollution to fight: a Levi northern lights experience and an Utsjoki northern lights evening in a traditional lavvu both build in waiting time by a fire while you watch the sky, which is exactly the patient, unhurried setup smartphone exposures need. None of these tours guarantee a display — nothing does — but a photographer or guide on hand can save you from spending the whole night fighting your phone’s menus instead of watching the sky.
If you’d rather understand the full range of guided aurora formats, from snowmobile to husky sled to boat, the aurora hunting guide for Rovaniemi lays out the options, and what guaranteed northern lights tours actually promise is worth reading before booking anything sold with that word in the title.
What to pack alongside the phone
Camera gear is only half the problem; staying out long enough to use it is the other half. The three-layer packing system covers what keeps you warm enough to stand still for the 20 to 30 minutes an aurora session on foot usually takes, and Ounasvaara, the low hill across the river from the town centre, is a five-minute drive or a longer walk from most hotels if you want a slightly darker, slightly elevated spot without a long trip out of town.
Smartphone aurora photography: frequently asked questions
Can any smartphone photograph the northern lights?
Most phones from the last three or four years can, provided they have a Night Mode or a manual camera app that allows exposures of several seconds. Older phones, budget models, and anything left on a fully automatic point-and-shoot mode will usually fail, returning either a black frame or a blurred, noisy one.
What camera settings do I need for aurora photos on a phone?
Switch to Night Mode or Pro/Manual mode, set the exposure to somewhere between 3 and 10 seconds, push ISO up only as far as the image stays usable (often 800 to 3200 depending on the phone), and set focus manually to infinity rather than letting autofocus hunt in the dark.
Do I need a tripod for smartphone aurora photography?
Yes. Any exposure longer than about half a second shows visible blur if the phone is handheld, and aurora exposures typically run 3 to 10 seconds. A compact tripod, a beanbag on a car roof, or the phone wedged against a fence post all work; what matters is that the phone does not move during the exposure.
Why does the cold affect my phone’s battery so much?
Lithium-ion batteries lose usable capacity as the temperature drops, and a phone that shows 40 percent charge at room temperature can shut itself off within minutes at minus 15 or minus 20 degrees Celsius. Keeping the phone in an inside pocket between shots, rather than mounted on a tripod the whole time, is the main fix.
Will Night Mode or Live Photo capture the aurora automatically?
Night Mode helps, but on many phones it still caps the exposure time or brightens the frame in a way that misreads a moving aurora as noise. Live Photo and standard auto mode are built for handheld, well-lit scenes and are not a substitute for a manual multi-second exposure with the phone held still.
How does a smartphone photo compare to a DSLR shot?
A DSLR or mirrorless camera with a fast wide lens gathers more light in less time, keeps noise lower at high ISO, and gives full manual control over aperture. A phone can produce a genuinely good, shareable aurora photo, but in faint or fast-moving displays it will show more noise, less detail, and a flatter dynamic range than a proper camera.
What is the biggest mistake first-time smartphone aurora photographers make?
Trusting the default camera app on auto and expecting it to recognise a dark sky with a faint moving light. It usually either refuses to expose long enough or brightens the image into a grainy mess. The fix is switching to Night Mode or a manual app and setting the exposure by hand before leaving the hotel.
Can I edit smartphone aurora photos afterwards to make them look better?
Yes, and it usually helps: pulling down highlights, lifting shadows slightly, and reducing noise in a free editing app can rescue a shot that looked disappointing straight out of the camera. It will not turn a blurred or badly exposed frame into a sharp one, so getting the exposure right on site still matters most.
Northern lights tours on GetYourGuide
Verified deep-linked GetYourGuide tours. Book through these links and we earn a small commission at no cost to you.
GetYourGuide does not provide a product photo for this activity — the image shows the meeting point, photographed by us.