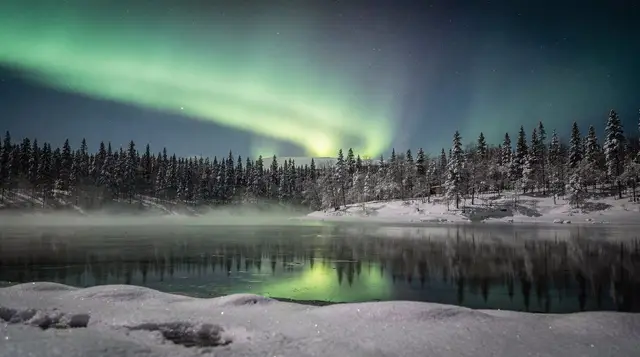
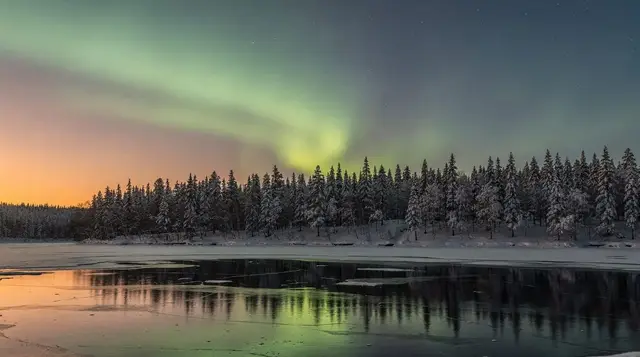
Camera settings for the northern lights
What camera settings work best for photographing the northern lights?
Start around f/2.8 or wider, ISO 1600 to 3200, and a 3 to 15 second shutter speed, then adjust the shutter to how fast the aurora is moving: shorter if it is dancing quickly, longer if it is a slow, diffuse glow. Shoot RAW so white balance and exposure can be corrected afterwards instead of fixed in-camera.
Why manual mode is non-negotiable
A camera’s automatic modes are built around daylight and indoor light, not a faint, moving light source against a black sky. Left to itself, a camera will either refuse to expose properly, hunt for focus on nothing, or flatten the aurora into a grey smear. Every setting below assumes full manual mode: manual exposure, manual focus, and RAW capture. This guide covers only the four settings that actually change what your file looks like — aperture, shutter speed, ISO and white balance.
It does not cover which camera or lens to buy (see photographing the northern lights with a DSLR or mirrorless camera for that), and it does not cover the tripod mistake that ruins otherwise correct settings (covered separately in the forgotten tripod mistake). If you only have a phone, the settings logic is the same in principle but the interface is different — see photographing the northern lights with a smartphone instead.
Before any of this matters, it helps to understand what you are actually pointing the camera at. Aurora activity above Rovaniemi varies from a static, dim band on the horizon to fast, pulsing curtains directly overhead within the same hour, and the correct settings for one are wrong for the other. There is more background on why that happens in how the northern lights actually work and on the seasonal side in the best time for the northern lights, month by month.
Aperture: let in as much light as the lens allows
Set the aperture as wide as your lens goes, and mostly leave it there. A dedicated wide-angle lens for night photography typically opens to f/2.8, f/2, or wider; a standard kit lens is usually limited to around f/3.5 at its widest focal length, which is noticeably slower but still usable. The wider the aperture, the more light reaches the sensor per second, which is what makes a shorter, sharper shutter speed possible in the first place.
There is little reason to stop down (use a smaller aperture, a higher f-number) for aurora shots unless you are deliberately trying to get more of the foreground in sharp focus, such as a tree line or a person close to the lens alongside a distant subject. Stopping down from f/2.8 to f/5.6 cuts the light reaching the sensor to a quarter, which then has to be made up somewhere else — a slower shutter, which risks blurring a fast-moving aurora, or a higher ISO, which adds noise. In most cases it is not worth the trade.
If your only lens is a slow kit lens, the settings below still work — you will simply lean harder on ISO and shutter speed to compensate, and the resulting files will be a little noisier. That is a real limitation, not a reason to abandon the attempt.
Shutter speed: match it to how the aurora is moving
This is the setting that has to change most often during a session, and it is the one place where there genuinely is no single correct number. The right shutter speed depends on how fast the aurora itself is moving across the sky, which can change within minutes.
A slow, diffuse aurora — a soft band or glow that barely seems to shift — tolerates a longer exposure well, typically 10 to 20 seconds. The shape holds together because there is little movement to blur. This is the easier case and the one most first-time settings guides describe, often without mentioning that it only applies to a calm aurora.
A fast, active aurora — pillars that flicker, curtains that ripple, or a display that visibly pulses — needs a much shorter exposure, typically 2 to 5 seconds. Anything longer smears the structure into a flat green haze with no visible rays or curtain shape, which is the single most common reason a photo of a genuinely spectacular display comes out looking like a dull green cloud. If the aurora is moving fast enough that you can see it changing shape by eye within a few seconds, that is the signal to shorten the shutter, not lengthen it.
Between those two extremes sits a working middle ground of roughly 5 to 10 seconds, which is a reasonable default to start a session on before you have seen how the aurora that night is behaving. Take a test frame, look at it, and adjust from there — this is not a setting to fix once and forget.
Shutter speed also has a practical ceiling that has nothing to do with the aurora: at wide-angle focal lengths, exposures longer than about 15 to 20 seconds start to show visible star trails rather than sharp points of light, because the earth’s rotation has moved the stars measurably across the frame. If a sharp starfield matters to the composition, that is a second, independent reason to keep the shutter shorter rather than longer.
ISO: balancing a bright frame against digital noise
ISO is the setting most people reach for first, and the one most often set too high out of nervousness that the shot will be too dark. Every increase in ISO amplifies both the signal and the sensor’s noise, so a higher ISO always costs some image quality — the question is how much you can afford to spend.
ISO 1600 to 3200 is a workable starting range on most modern APS-C and full-frame cameras, including mid-range models from the last several years. At these values, noise is present but manageable, especially once processed from a RAW file. Older cameras, smaller sensors, and compact or bridge cameras will show more noise at the same ISO and may need to compensate with a longer shutter speed or wider aperture instead of pushing ISO further.
The relationship between the three settings is what matters, not any one number in isolation. If the frame is too dark after a test shot, you have three options: open the aperture further (if there is room to), lengthen the shutter (if the aurora’s movement allows it), or raise the ISO. If the aurora is moving fast and the shutter is already as short as the movement demands, ISO becomes the only lever left, and it is reasonable to push it higher than you would for a static scene — a noisy but recognisable shot of fast curtains beats a smooth but blurred one.
Check the result on the camera’s histogram rather than trusting the small rear screen’s brightness, which is unreliable in the dark and often makes a frame look brighter than the actual file is. A histogram bunched hard against the left edge means the exposure is too dark regardless of how it looks on the screen.
White balance: it barely matters if you shoot RAW
White balance decides whether the sky and the aurora render with a cooler, bluer cast or a warmer, more neutral one. For the northern lights, a manual white balance somewhere around 3000K to 4500K typically produces a natural-looking result, cooler than daylight but not as blue as the camera’s default “auto” setting sometimes pushes a night sky.
The more important point is that white balance is one of the few settings on this list that does not need to be exactly right at the time of capture — provided you are shooting RAW. In a RAW file, white balance is stored as an adjustable value rather than baked into the pixel data, so it can be changed after the fact with no loss of quality, in the same editing software used to process the file at home. Setting it roughly in the right zone in-camera is mainly useful so that the image on the rear screen and histogram look reasonably close to the final result while you are still in the field checking exposure — not because the in-camera value is final.
Shoot RAW, not JPEG
If there is one setting to get right before leaving the hotel, it is the file format. Set the camera to capture RAW, or RAW plus JPEG if you want a quick shareable file as well, but make sure RAW is included.
A JPEG file discards a large amount of the sensor’s original data and applies the camera’s white balance, contrast and noise-reduction choices permanently at the moment of capture. A RAW file keeps far more of that original data, which means exposure can be nudged, white balance corrected, and shadow or highlight detail recovered afterwards with much more latitude than a JPEG allows. Given that aurora exposures are inherently a guess refined by trial and error in the dark, that extra room to correct mistakes afterwards is worth far more here than in ordinary daylight photography.
The trade-off is file size and workflow: RAW files are larger, fill memory cards faster, and need to be processed in software rather than being ready to share straight off the card. For a night spent chasing the aurora, that trade is almost always worth it.
A practical starting-point table
None of the numbers below are the correct setting — they are a place to start a first test shot from, to be adjusted once you see the actual file and the actual sky. Treat this as a table of first guesses, not a table of answers.
| Aurora behaviour | Aperture | Shutter speed | ISO (starting point) |
|---|---|---|---|
| Faint, static glow near the horizon | Widest available | 15–20 s | 1600–2500 |
| Steady band or arc, slow movement | Widest available | 8–15 s | 1600–3200 |
| Moderate activity, gentle ripple | Widest available | 4–8 s | 2000–3200 |
| Fast, dancing curtains or pillars | Widest available | 2–5 s | 2500–4000+ |
| Adding a sharp foreground/person | Widest available, or f/4–5.6 if focus depth needed | Match aurora speed above | Raise to compensate for narrower aperture |
The ISO ranges overlap deliberately — the correct value within a range depends on the specific camera’s sensor, how much noise you are willing to accept, and how dark the actual sky is that night away from any light pollution. A clearer sky and darker location generally allows a slightly lower ISO for the same exposure.
A five-minute workflow once you are set up
- Set focus manually to infinity, using live view zoomed in on a bright star to confirm it is sharp, then leave the focus ring alone for the rest of the session.
- Start from the middle row of the table above — widest aperture, 8 to 15 seconds, ISO 1600 to 3200 — and take one test frame.
- Check the histogram, not the screen brightness. If the peak sits too far left, the frame is under-exposed; adjust ISO or shutter first.
- Watch the aurora for 30 to 60 seconds before the next shot. If it is visibly moving or pulsing, shorten the shutter speed and, if needed, raise the ISO to compensate.
- Re-check every few minutes for the rest of the session. Aurora activity genuinely does change this fast, and a setting that was right ten minutes ago can be wrong now.
If working out settings in the cold and the dark is not something you want to manage alone, several operators run trips with a photographer who sets the camera and talks a group through it, which removes the trial-and-error entirely.
A city photography tour in Rovaniemi covers the same manual-exposure basics on easier, well-lit subjects before dark, while a guided night out such as the aurora tour in Saariselkä is built specifically around getting people into position with settings already dialled in. For a one-to-one session where the pace is entirely yours, a private outdoors photo session is the more deliberate option.
Common exposure mistakes worth avoiding
Locking one setting for the whole night. The most common mistake is not a wrong number but a fixed one: settings correct for a faint glow at 9pm are wrong an hour later once the display picks up. Re-check regularly.
Chasing a brighter screen instead of a correct histogram. The rear LCD screen is itself lit in a dark environment and tends to look brighter than the file actually is, which leads people to under-expose without realising it. The histogram does not lie the way the screen can.
Overexposing the moon or village lights in frame. A long exposure that suits a dark sky will badly blow out a bright moon or a lit building included in the same composition, turning it into a featureless white patch with no detail. If a bright light source is unavoidably in frame, a shorter exposure or a composition that keeps it smaller in the frame usually works better than trying to expose for the aurora alone.
Expecting the photo to match what the eye saw. A multi-second exposure gathers far more light than the human eye can process in real time, which is why aurora photographs often look more vividly green than what most people actually see standing under the same sky. That gap between the eye and the camera is a real effect worth understanding on its own — see what you actually see with the naked eye versus the camera for the full explanation, since it is the single biggest cause of disappointment among first-time aurora watchers.
Treating a wide aperture as fixed regardless of the shot. If part of the composition includes a sharp foreground subject close to the lens, a wide-open aperture may leave that subject soft while the sky is sharp. That is a composition choice, not a settings error, but it is worth deciding on purpose rather than by accident.
None of these settings do the whole job on their own. A well-exposed but blurred frame because the camera moved during a long exposure is still a failed shot regardless of how correct the aperture, ISO and shutter speed were — that particular failure mode, and how to avoid it, is covered on its own in the forgotten tripod mistake.
It is also worth remembering that camera settings only solve the exposure problem, not the underlying weather and darkness problem: a clear sky away from cloud cover still matters more than any setting on this page, which is covered in the aurora hunting guide for Rovaniemi, chasing clear skies by car, and the list of free northern lights viewing spots and walking aurora spots near Rovaniemi for those without a car.
Checking activity forecasts before heading out is covered in aurora forecast apps and tools, and once the aurora settings are sorted, the same wide-aperture, manual-exposure approach carries over to arctic landscape photography beyond auroras for daytime shots around the region. For a wider look at photography options and guided sessions in the area, the things to do: photography category page lists the current options together.
Camera settings for aurora photography: frequently asked questions
What is a good starting ISO for the northern lights?
ISO 1600 to 3200 is a reasonable place to begin on most modern cameras. Raise it if the frame still looks dark after checking the histogram, lower it if you have room to use a slower shutter speed instead, since a lower ISO always produces less noise for the same exposure.
Should I use a fast or slow shutter speed for auroras?
It depends on how the aurora is moving, not on a fixed rule. A slow, diffuse glow can take 10 to 20 seconds without losing shape. A fast, dancing or pulsing aurora needs 2 to 5 seconds, or it blurs into a flat green smear with no structure.
What aperture should I use for aurora photography?
The widest your lens allows, typically f/2.8 or wider on a dedicated lens, or the widest end of a kit lens if that is what you have. A wide aperture lets in more light per second, which is what makes shorter, sharper shutter speeds possible.
What white balance is correct for the northern lights?
There is no single correct value; most photographers land somewhere between 3000K and 4500K. If you shoot RAW, the exact in-camera setting barely matters because white balance is fully adjustable afterwards without any loss of quality.
Why do photos shot in RAW look better than JPEG for auroras?
RAW keeps far more of the sensor’s original data, which means white balance, exposure and shadow detail can be corrected after the fact. A JPEG bakes those choices in at the moment of capture, so a wrong white balance or a slightly dark frame is much harder to recover.
Why does my aurora photo look brighter green than what I saw?
A long exposure gathers light over several seconds, which makes faint colour visible that the naked eye cannot register in real time. This is a sensor effect, not a setting mistake, and it is the main reason brochure photos look more vivid than what most visitors actually see in the sky.
Do I need to change settings during the same night?
Usually yes. Aurora activity changes in minutes: a faint arc can flare into fast-moving pillars and back again. Treat every setting here as a starting point to re-check on the camera’s histogram and live view, not a value to lock in for the whole session.
Northern lights tours on GetYourGuide
Verified deep-linked GetYourGuide tours. Book through these links and we earn a small commission at no cost to you.
GetYourGuide does not provide a product photo for this activity — the image shows the meeting point, photographed by us.