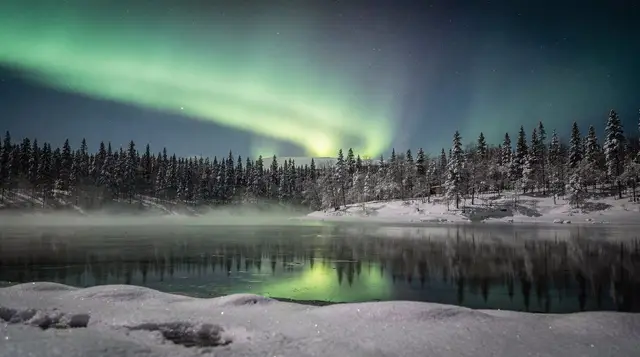
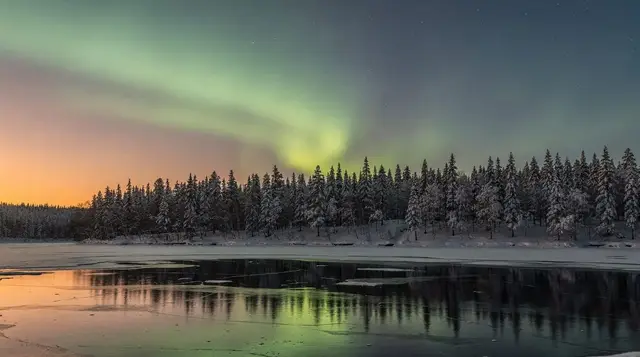
Photographing the northern lights with a DSLR or mirrorless camera
What camera settings do I need to photograph the northern lights?
You need a stable tripod, manual mode, the widest aperture your lens allows, and manual focus set to infinity, triggered by a remote release or self-timer so you never touch the camera during the exposure. Exact ISO and shutter speed depend on how bright the aurora is on the night, which is covered on a dedicated settings page rather than here.
A phone can now catch a passable aurora photo in its night mode, but a DSLR or mirrorless camera is still the tool that gives you control over what the final image looks like, and it rewards a bit of technique in a way a phone mostly does not. None of it is complicated. It is five habits, done in the right order, in the dark, in gloves, at temperatures that make batteries misbehave and fingers clumsy. This page covers those habits: the tripod, manual mode, aperture, manual focus, and how to trigger the shutter without shaking the camera.
It does not walk through exact ISO and shutter speed numbers, because those depend on how bright the aurora is on a given night and get their own page at camera settings for auroras, and it does not cover phone photography, which has its own techniques and is treated separately at photographing the northern lights on a smartphone.
The three things that matter more than any camera setting
Before any discussion of aperture or shutter speed, three things decide whether you come home with usable photos at all: a tripod that does not move, focus that is actually on infinity rather than close to it, and a way of triggering the shutter that does not nudge the camera. Get an aurora bright enough for a long exposure to reveal, on a camera that is shaking by even a millimetre or slightly out of focus, and the result is a soft green smear rather than a photograph.
Most disappointing aurora photos trace back to one of these three, not to a wrong ISO. For background on why the aurora happens at all and how activity, cloud cover and darkness combine, see how the northern lights work and the aurora hunting guide for Rovaniemi.
A tripod is not optional
Aurora photography usually needs an exposure of one to several seconds, sometimes longer on a faint night. Handheld, at those speeds, every photo blurs. A tripod is the one piece of equipment on this list with no substitute: propping the camera on a car roof or a snowbank sometimes works in a pinch, but it is not something to plan around.
In practice, two things go wrong with tripods in Lapland rather than anywhere else. First, cold makes plastic leg locks brittle and stiff, so cheap tripods that feel fine at home can slip or refuse to lock at minus 20. Test yours before the trip, not on the night. Second, wind on open ground, especially near a lake or a fell like Ounasvaara, can shake even a locked tripod enough to blur a long exposure; hang a bag from the centre column, or keep the tripod low and the legs spread wide, if the wind is up.
A related and very common mistake, forgetting to switch off image stabilisation once the camera is on a tripod, is covered on its own page at the forgotten tripod mistake, because stabilisation systems can introduce blur rather than remove it when the camera is already still.
Shoot in manual mode, always
Leave the camera on automatic or aperture-priority in the dark and it will usually either refuse to expose properly or choose a shutter speed far too slow, blurring the aurora’s movement into a flat glow. Manual mode, where you set aperture, shutter speed and ISO yourself, is the only mode that gives a predictable, repeatable result from one frame to the next, which matters because you will be adjusting between frames as the aurora brightens or fades.
Switch off the flash entirely; it does nothing useful at aurora distances and will ruin everyone’s night vision, including your own. If your camera has long-exposure noise reduction, which takes a second dark frame after every shot to subtract sensor noise, consider turning it off too: it roughly doubles the time between frames, and on a night when the aurora is moving fast, that gap can mean missing the best few minutes entirely.
Aperture: open it as wide as your lens allows
Set the aperture to the widest your lens supports, expressed as the smallest f-number, such as f/2.8 or f/1.8 rather than f/8 or f/11. A wide aperture lets in more light per second, which means a shorter exposure for the same brightness, which in turn keeps the aurora’s texture and shape sharper rather than smeared into a flat wash. It also means less time standing still doing nothing while the shutter is open, which matters more than it sounds once you are cold.
The trade-off is that a wide aperture narrows what is in focus and can soften the corners of the frame slightly on cheaper lenses; for aurora photography this trade is almost always worth making. If you own more than one lens, a wide-angle prime or zoom with a maximum aperture of f/2.8 or wider is the one worth bringing outside on an aurora night, over a longer telephoto lens better suited to daytime landscape work covered at Arctic landscape photography beyond the aurora.
Shutter speed: a starting point, not a formula here
Shutter speed is the setting that changes most from one night to the next, because it depends directly on how bright and how fast-moving the aurora is: a faint, slow band might need eight to fifteen seconds to register, while a strong, fast-pulsing display can look sharper and more detailed at two to four seconds.
Because that range depends on conditions you cannot know in advance, working through the exact numbers, and how ISO trades off against them, is covered in full on the dedicated camera settings guide rather than here. The practical habit worth taking from this page is simpler: shoot a test frame, look at the result on the camera screen rather than trusting your eyes in the dark, and adjust shutter speed down if the aurora looks smeared, or up if the frame looks too dark or too noisy.
Manual focus, set once, to infinity
Autofocus does not work reliably in the dark. Pointed at a black sky, most lenses will hunt back and forth and never lock, and even when they do lock on a star, the next frame can hunt again. Switch the lens to manual focus before it gets dark, ideally back at the cabin or hotel, and set focus using live view zoomed in on a distant light, a bright star, or the horizon, turning the ring slowly until the point is as sharp as it will go. Many lenses do not have a hard stop exactly at infinity, so trust the live view image over the markings printed on the lens barrel.
Once focus is set, leave it alone for the rest of the night, and consider a strip of gaffer tape across the focus ring so a gloved hand does not nudge it by accident while adjusting other settings. This single habit, done once at the start of the evening, prevents more ruined photos than any setting on this page. For a broader sense of what a camera captures that the eye does not, and why focus errors are so easy to miss on a small screen in the dark, see eye versus camera: what you really see.
Trigger the shutter without touching the camera
Pressing the shutter button by hand, even gently, transmits a small shake into the camera, and on a multi-second exposure that shake shows up as a soft double edge on stars and on the aurora itself. Three ways round it work equally well: a wired or wireless remote release, the camera’s built-in two-second self-timer, or, on cameras that support it, a smartphone app connected over Bluetooth or wifi. The self-timer is the option needing no extra kit and is worth setting as a habit before you leave home, since a remote release is one more small object to lose or leave behind with cold-numbed hands in the dark.
The cold problem: batteries die faster than you think
This is the mistake that catches out more people than any focus or exposure error, so it earns its own section rather than a footnote. Lithium-ion batteries lose charge sharply as temperature drops, and Rovaniemi sits routinely at minus 10 to minus 25 Celsius through winter, with spells below minus 30 in most years. A battery reading half full indoors can show empty within twenty to thirty minutes outside, and the same battery, warmed back up in a pocket, will often show charge again, which is a sign of how the cold was suppressing the reading, not proof the battery is faulty.
The fix is simple and worth doing before every aurora session: carry at least one spare battery, and keep it in an inner pocket against your body rather than in a camera bag or jacket pocket exposed to the outside air. Swap batteries the moment performance drops rather than waiting for the camera to shut off mid-sequence, and let a cold battery warm fully before assuming it is dead. The same logic applies to memory cards in a smaller way: carry a spare, since changing one with numb fingers at minus 20 is unpleasant enough that you want to do it as rarely as possible, and a full card partway through a long tour is a common, entirely avoidable way to miss the best display of the night.
Composition: what else to put in the frame
A sky full of green light on its own photographs well for a few frames and then starts to look the same as every other aurora photograph online. Foreground interest changes that: a treeline, a frozen lake with visible ice texture, the outline of a fell, a lit cabin window, or people standing in the frame for scale.
Rovaniemi’s own skyline offers a few workable foregrounds close to town, including the Kemijoki river and the lit form of the Jätkänkynttilä bridge, though light pollution from the town itself limits how much of the aurora shows against it; getting further out, toward the Arctic Circle hiking area or on a tour that drives away from town lights, generally produces a darker sky and a stronger result.
A wide-angle lens helps here too, since it takes in more foreground alongside the sky without needing to stand unreasonably far back. If the moon is up, do not treat it as a problem: a bright moon lights the landscape enough to bring out foreground detail that would otherwise sit as a black silhouette, at the cost of a slightly less inky sky, a trade many photographers actively choose. For a wider sense of where cloud cover tends to break and where a clear patch of sky is more likely on a given night, the aurora forecast apps and tools guide and chasing the lights by car both cover the planning side that sits alongside the camera technique on this page.
A gear checklist for a night out with a camera
| Item | Why it matters in the cold |
|---|---|
| Tripod, tested beforehand | Plastic leg locks can stiffen or slip below about minus 15 |
| Spare battery, kept in an inner pocket | Charge drops sharply in cold air, recovers when warmed |
| Spare memory card | Avoids a card-change with numb fingers mid-display |
| Head torch with a red-light mode | Preserves night vision for you and everyone nearby |
| Lens cloth | Condensation and breath fog lenses fast in still air |
| Gloves that allow some dexterity | Thick mittens make dial and button changes very slow |
| Gaffer tape or a marked focus ring | Stops focus drifting once it is set to infinity |
Where this sits alongside a tour
None of the technique on this page requires a guide, and plenty of visitors drive themselves out along a quiet road and shoot from the roadside with no assistance at all. Where a guide adds something specific to photography, rather than just to seeing the aurora, is in site choice and patience: a guide who has scouted a location with a genuinely open view north, and who is willing to stay put with a group of tripods rather than move on after twenty minutes, changes the odds of a usable set of photographs more than any camera setting does.
A few tour formats lean into this directly. An evening built around a fire and a fixed viewing spot, such as a northern lights evening around a campfire in Levi, gives a stationary base to set up a tripod properly rather than shooting from a moving group. For daytime technique practice and composition coaching before an aurora attempt, a guided photography walk around Rovaniemi itself is a low-stakes way to get comfortable with manual mode and a tripod in daylight first.
Travellers who want one-to-one attention on settings and framing, rather than sharing a guide’s time across a group, tend to get more out of a private outdoor photo session built around their own pace. Further north, where light pollution is lower and skies are statistically clearer more often, an aurora evening at a traditional lavvu shelter near Utsjoki combines a dark, wide-open site with somewhere warm to retreat to between exposures.
Aurora photography questions answered
Do I need an expensive camera to photograph the northern lights?
No. Most DSLRs and mirrorless cameras from the last ten years can do it, as long as the camera has a manual mode and you can turn off the flash and any automatic long-exposure noise reduction that eats into your shooting time. A cheap, stable tripod matters more than an expensive camera body.
Can I photograph the aurora on my phone instead?
Modern phones with a dedicated night mode can capture a visible aurora, and it is a genuinely separate technique with its own settings and tripod mounts, covered on its own page rather than here. A DSLR or mirrorless camera still gives more control over exposure and produces a cleaner result at higher ISO.
Why does my photo show bright green when I could barely see any colour?
A camera sensor collects light over several seconds and renders it as a saturated colour that the naked eye, working in real time, usually cannot match. What you see is often a pale grey-green band; what the sensor records after a long exposure is the same light, accumulated. Neither is wrong, they are just different instruments.
What tripod do I actually need in Lapland?
Any tripod that does not move in wind and does not have its legs collapse when the plastic parts stiffen in the cold. Aluminium tripods get painfully cold to handle bare-handed; carbon fibre is lighter and slightly less punishing on the fingers. Avoid the smallest travel tripods sold as phone accessories, they are rarely stable enough for a multi-second exposure.
How do I focus on the aurora when it is completely dark?
Switch the lens to manual focus before you leave the car or cabin, then focus once during daylight or on a distant streetlight and tape the focus ring in place, or use your camera’s live view zoomed in on a bright star to fine-tune focus by eye. Autofocus does not work reliably on a dark sky and will hunt back and forth without locking.
Why does my camera battery die so fast outside?
Lithium-ion batteries lose charge much faster in temperatures from minus 10 to minus 25 Celsius, and Rovaniemi routinely drops below minus 30 in midwinter. A battery that shows half charge indoors can read empty within twenty minutes outside, then partially recover once it warms back up, which is misleading rather than reassuring.
Should I bring a spare memory card?
Yes, and treat it as compulsory rather than optional. Cold weather does not usually corrupt cards, but changing a card with numb fingers at minus 20 is unpleasant, and a full card two hours into a six-hour tour with no way to clear space is a common way to miss the best display of the night.
Is it worth joining a tour aimed specifically at photography?
If getting a usable photograph matters more to you than the general experience, yes. A guide who works with photography groups will pick a site with an open view north, allow the group to set up tripods rather than move on quickly, and often knows how to help with focus and composition on the spot. For the settings themselves once the site and gear are sorted, move on to camera settings for auroras, and for what a good but non-guaranteed night realistically looks like month by month, see best time for the northern lights, month by month.
Northern lights tours on GetYourGuide
Verified deep-linked GetYourGuide tours. Book through these links and we earn a small commission at no cost to you.
GetYourGuide does not provide a product photo for this activity — the image shows the meeting point, photographed by us.