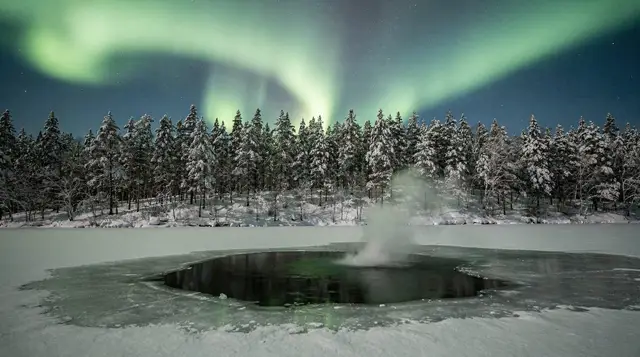
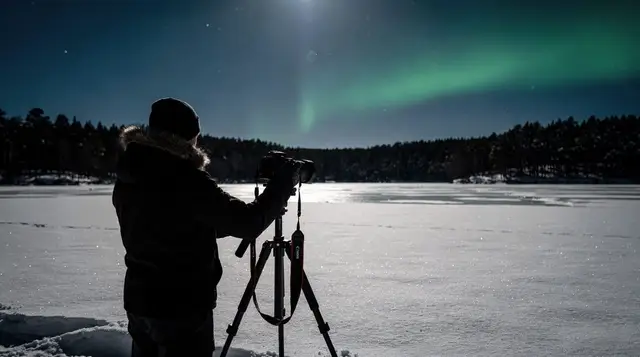
What your eyes see versus what the camera captures
Do the northern lights really look like the photos?
Usually not exactly. On a typical night the naked eye sees a pale grey or green band that moves and pulses, while a camera's long exposure gathers light over several seconds and renders it as saturated green, purple or red. On a strong night, though, the eye does see real colour, so neither version is a lie.
The gap between the brochure and the sky above your head
Every operator running an aurora tour from Rovaniemi uses the same kind of photograph: a sky split by ribbons of saturated green, sometimes shot through with violet or red, reflected in a frozen lake. Those photographs are real. They were taken in Finnish Lapland, often not far from Rovaniemi, and nobody is faking the colour in Photoshop. What the brochure does not explain is that the photograph and what the photographer’s own eyes saw at that moment are frequently two different experiences. Understanding why is the single most useful thing you can know before paying for a night out under the sky.
This page is not about camera settings. If you want shutter speeds and ISO values, that is covered separately for both DSLR and mirrorless cameras and for phones. This page is about the more basic question that shapes whether you leave Rovaniemi happy or disappointed: what will you, personally, standing in the cold with no equipment, actually see.
Why the eye and the camera do not agree
A camera sensor and a human eye gather light in fundamentally different ways, and that difference is the entire explanation for the mismatch between photos and memory.
A long-exposure photograph, taken with the shutter open for anywhere from one to fifteen seconds, adds up every photon that lands on the sensor during that whole window. Light that would be too faint to notice in a single instant accumulates, frame by frame, into a bright, saturated result. A camera is, in effect, cheating time: it is showing you several seconds of aurora activity compressed into one still image, with the colour intensity of all those seconds added together.
Your eye does not work that way. It samples the world continuously and roughly in real time, with no accumulation. What you see at any given moment is what arrived in roughly that moment, not the sum of the last ten seconds. So a faint aurora that a camera renders as a strong green curtain might, to your eye, look like a pale, shifting haze — because your eye is reporting the true instantaneous brightness, while the camera is reporting an average built up over time.
There is a second factor, and it matters as much as the first: colour vision itself requires more light than brightness vision does. For a full explanation of the physics behind why the aurora happens at all, see how the northern lights work; the relevant point here is simpler. The retina has two kinds of light receptors.
Rod cells are extremely sensitive to dim light but cannot distinguish colour — they only report brightness and motion. Cone cells detect colour but need considerably more light to activate. In full daylight, cones dominate and you see a rich, colourful world. At night, under aurora conditions, rods often do most of the work, which is why a moving band of light can be clearly visible as a shape while its actual colour reads as grey, pale green, or almost white.
Put the two effects together and the pattern becomes clear. A weak-to-moderate aurora, which is the most common kind on any given night in the Rovaniemi area, is often bright enough for your rod cells to register shape and movement, but not bright enough for your cone cells to register strong colour. The camera, accumulating light over several seconds, has no such limitation — it renders that same weak aurora in vivid green because it is adding up light your eye never saw all at once.
What this actually looks like, night by night
Aurora intensity is not one thing. It ranges from barely perceptible to spectacular, and what you see with your own eyes changes considerably across that range. It helps to think in three rough bands rather than a single expectation.
A weak display often looks like a pale grey-white arc or patch low on the northern horizon, sometimes mistaken for a thin cloud or the glow of a distant town. It may brighten and fade slowly over minutes. Photographed with a five- to ten-second exposure, the same patch commonly shows as a distinct green band. If you are told “there is aurora activity tonight” and step outside expecting a moving green curtain, this level of display is the one most likely to leave you unimpressed — not because nothing happened, but because what happened was genuinely faint.
A moderate display is where most successful tour nights land. You will usually see clear movement: a band or arc that brightens, shifts, ripples, or develops folds, sometimes described as looking like a searchlight beam or a slow-moving curtain. Colour becomes more apparent here, typically a pale to distinct green, and if the display briefly intensifies you may catch a hint of pink or purple at the lower edge. This is often enough to convince most visitors the trip was worthwhile, even though the colour saturation still falls well short of the photographs.
A strong display, the kind associated with high geomagnetic activity, is genuinely different, and this is the case worth stating plainly: on a strong night, the human eye does see real, saturated colour. Fast-moving green curtains, sometimes with visible red or violet fringes, are directly visible without any camera. People who have only seen weak displays before often describe a strong aurora as looking “exactly like the photos,” and for once that description is accurate. Strong displays are less common than weak ones, but they do happen, and Rovaniemi’s position under the auroral oval means the region gets its share of them across a winter season.
The mistake to avoid is assuming the relationship only runs one way. It is not true that everything visible in a photo is invisible to the eye, and it is equally not true that a strong aurora always looks the same as a weak one just because a camera can photograph both. Intensity determines the experience far more than the mere fact that “aurora activity” was forecast for the night.
Dark adaptation: the step most people skip
Even on a moderate or strong night, a significant number of disappointed visitors have sabotaged their own eyes before stepping outside. Human night vision takes time to develop. The rod cells responsible for detecting faint light need roughly 20 to 30 minutes of darkness to reach their full sensitivity, and that adaptation is undone almost instantly by looking at a bright phone screen, a car’s headlights, or a well-lit cabin doorway.
This is a genuinely practical point, not a minor technicality. A group that steps off a minibus, checks phones for photos other people have already taken, chats under a floodlit car park, and only then looks up is seeing the sky with eyes that are nowhere near fully adapted. The same group, given 20 quiet minutes with red-light torches only (red light preserves night vision far better than white light) and no phone screens, will often report a noticeably brighter and more colourful aurora from the exact same display. If your guide does not mention this, it is worth doing anyway.
Why the brochure is not lying, and why it still misleads
It is worth separating two claims that get run together. The claim “these photos were taken here” is true. The claim, implied but rarely stated, that “this is what you will see with your own eyes” is often false, at least on an average night. Both things can be true at once, and understanding that distinction removes most of the sting of disappointment.
Operators are not being dishonest by using their best photographs to market a tour — that is normal for any activity with variable outcomes, comparable to a ski resort advertising its best powder day. Wording that promises a “guaranteed” sighting deserves more scrutiny, and that specific claim is covered in detail in the guide to how guaranteed northern lights tours actually work: the guarantee is almost always a rebooking or refund policy for the tour, not a guarantee that the phenomenon itself will appear, let alone appear at photograph-level intensity.
Setting your own expectations before you book
The most useful thing you can do before a night out is recalibrate what “success” means. A night where you saw a pale, moving grey-green band for twenty minutes, understood what you were looking at, and felt the cold and the quiet of the Lapland countryside is a successful aurora night, even if your photos (or the guide’s photos) look more dramatic than your memory. A night with genuinely no visible activity at all — thick cloud, or a geomagnetically quiet period — is the actual failure case, and it is worth knowing in advance that this happens even on well-organised tours, because cloud cover, not solar activity, is usually the deciding factor on any given night.
If seeing strong, camera-level colour with your own eyes matters to you specifically, a few practical choices improve your odds, though none guarantees the outcome:
- Travel in the shoulder seasons. Late August to October and February to March tend to have more stable, clearer skies around Rovaniemi than the cloudier core of December and January, and clear sky is the precondition for seeing anything at all.
- Get well away from artificial light. Streetlights and floodlighting wash out faint colour before it reaches your eye; a genuinely dark site well outside town, of the kind used on most guided tours, gives your eyes the best chance.
- Give your eyes the 20 to 30 minutes they need, away from screens and headlights, before judging what is or is not visible.
- Stay out for the full window rather than a single glance. Aurora activity pulses; a quiet ten minutes can be followed by a genuinely strong ten minutes, and leaving early on a slow patch is a common regret.
- If you specifically want a guided explanation of what you’re seeing in real time, an aurora tour led by a working photographer will usually narrate the difference between what the group’s eyes are seeing and what is showing up on screens as it happens, which is often the fastest way to understand the gap for yourself.
For visitors who want a dedicated evening focused on this exact question, a guided Ranua night tour that pairs aurora watching with a campfire meal and a photographer’s camera lets you compare the group’s naked-eye view against what a proper long exposure captures side by side, rather than only seeing one version of the night.
Photography without the sky cooperating
Because aurora activity is never guaranteed on any single night, it is worth remembering that Rovaniemi and the surrounding area offer plenty to photograph regardless of what the sky does after dark. A guided daytime photography walk through Rovaniemi covers the reconstructed post-war centre, the Kemijoki riverfront and the Lumberjack’s Candle Bridge, all useful groundwork for understanding light and composition in the Arctic before you attempt a night sky.
If you would rather work the blue hour and early evening light without banking everything on aurora activity, a winter photography walk with a guide, snacks and hot drinks included is a lower-stakes way to come home with images even on a cloudy night.
Beyond the aurora itself
The gap between eye and camera is not unique to the northern lights, though it is at its most extreme there. Snow-laden forest, the low winter sun skimming the horizon for a few hours around midday, and the blue half-light of the kaamos period all photograph differently from how they feel in person, usually because a camera can pull detail out of shadow and balance colour temperature in ways the eye does not consciously do.
The wider subject of Arctic light and landscape, separate from aurora chasing, is covered in the guide to Arctic landscape photography beyond the aurora, and a snowshoeing outing with a photography guide is one practical way to explore that light on quiet trails away from the city rather than only chasing it after dark.
If your priority is simply maximising the chance of seeing something at all with your own eyes, rather than photographing it, the guide to free viewing spots within walking distance of Rovaniemi and the month-by-month breakdown of when the northern lights are most likely to appear are the more useful starting points than anything camera-related. Camera settings, once you do want to try capturing what you see, are covered step by step in the dedicated settings guide, including the tripod mistake that ruins more aurora photos than any exposure error does.
The honest summary
Most aurora nights around Rovaniemi and across Finnish Lapland show something visible to the naked eye — a pale, moving band of grey-green light that is real, worth watching, and quietly impressive once you understand what dark-adapted human night vision can and cannot register. It is not, on an average night, the saturated green-and-violet spectacle of a five-second exposure, and no honest guide should tell you otherwise.
On a genuinely strong night, though, that spectacle is exactly what your own eyes will see, colour and all. Neither the modest grey band nor the vivid green curtain is the “true” aurora and the other a trick; both are accurate descriptions of the same physical event at different intensities, observed through two different kinds of eye — yours, and the sensor’s.
Photography tours on GetYourGuide
Verified deep-linked GetYourGuide tours. Book through these links and we earn a small commission at no cost to you.
GetYourGuide does not provide a product photo for this activity — the image shows the meeting point, photographed by us.