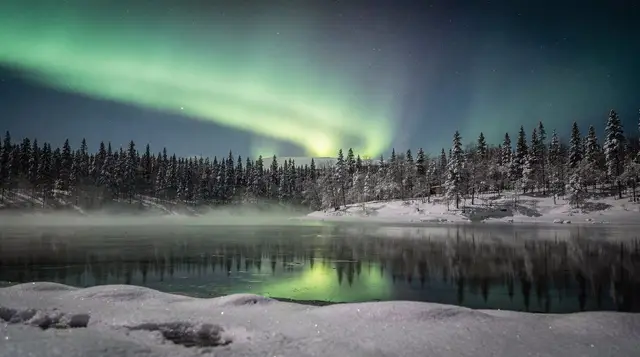
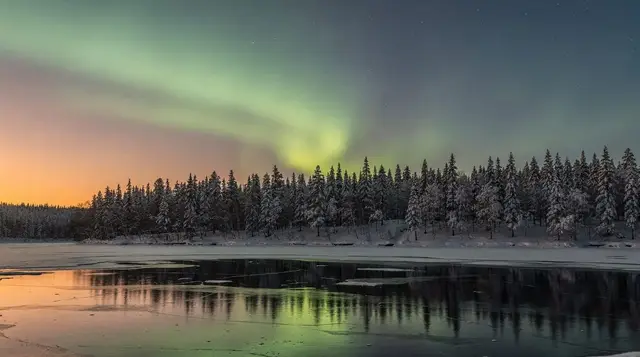
Aurora photography tours with a guide
Are guided aurora photography tours worth it if I don't own a camera?
Yes, if the operator confirms in advance that a camera and tripod are provided, not just recommended. You get in-field coaching on framing and settings and, on some tours, help exporting your shots at the end. The photos still depend entirely on the weather and the aurora activity that particular night, which no guide controls.
If you’ve never used manual exposure and don’t own a tripod, a normal aurora tour can be frustrating: the guide drives you to a dark spot, points at the sky, and leaves you to work out shutter speed and focus in the cold and dark on your own. A photography-led tour changes that arrangement. A working photographer runs the evening, sets you up, and coaches your settings shot by shot. It costs more than a standard tour and it still can’t make clouds part or the aurora appear, but for a visitor who wants a real photo to take home and no camera background to speak of, it’s usually the better booking.
What a photography-led tour actually gives you
The core difference from a standard aurora hunting tour is who’s in charge of the evening and what they’re focused on. On a generic minibus tour, the guide’s job is finding clear, dark sky and keeping the group warm and safe; photography is incidental, and any camera help is whatever the driver can spare between checking the forecast and watching the road. On a photography-led tour, a photographer who shoots auroras for a living runs the stops: they pick the composition, set tripods at working height, and talk you through exposure, ISO and focus for that specific sky, not from a generic checklist.
What that buys you in practice:
- A tripod set up correctly, at a stable height, on ground the photographer has judged solid enough not to shift during a long exposure.
- Camera settings dialled in for the moment, adjusted as the aurora brightens, fades, or the moon comes up, rather than one fixed setting for the whole night.
- Framing advice — including a treeline, the Kemijoki river, or a person as a foreground subject, rather than a flat shot of sky.
- On some tours, a loaned camera and lens, so owning equipment isn’t a barrier to booking.
- On some tours, help exporting or lightly editing your best shots before the evening ends, so you leave with finished files, not just raw frames on a memory card.
None of this changes the physics. The difference between what your eye sees and what a camera records is real: a long exposure gathers light your eye can’t, which is exactly why coaching on settings matters so much for a beginner, and exactly why a photographer’s help is worth more here than on almost any other kind of tour.
Who this is actually for
This category of tour suits a specific traveller: someone without a camera background, or with a camera they’ve never used outside auto mode, who wants photos of the aurora that look like the ones in the brochure rather than a shaky, underexposed phone shot. If you already shoot manual regularly and travel with your own tripod, the coaching adds less value and you may prefer a standard aurora hunting tour or driving yourself with a guide’s forecast tools for reference.
It also suits couples and small groups who want one or two genuinely good shots of themselves under the aurora rather than a stack of empty sky photos — a photography guide will usually offer to shoot a few frames of you as the subject, something a standard tour driver rarely has time for.
It doesn’t suit anyone chasing a guaranteed result. Read the tour description carefully: a “photography tour” promises coaching and equipment, not a night with visible aurora. That distinction matters more here than on most bookings, because a photography-focused evening raises expectations that weather and geomagnetic activity can still flatten completely. For how operators word this honestly, see guaranteed northern lights tours explained.
How the evening actually runs
Most photography-led aurora tours follow a similar shape, adapted around the night’s forecast:
- Pickup and briefing, usually 6 to 8pm, where the photographer checks the cloud and aurora forecast and picks a rough direction to drive — the same forecast tools covered in aurora forecast apps and tools.
- Driving to darker sky, often 30 minutes to over an hour outside Rovaniemi, away from town lighting and cloud that’s sitting over the city.
- Setting up at the first stop — tripods out, cameras handed round if provided, settings explained once as a group and then adjusted individually.
- Shooting through the evening, moving to a second or third location if the first clouds over, with the photographer coaching continuously rather than leaving you to figure it out alone.
- A warm break, typically a fire, hot drink and something to eat, which most operators build in regardless of how the sky is behaving.
- Return and, on some tours, a quick review of the best frames before drop-off, usually back at your accommodation between 11pm and 1am.
The whole evening runs 4 to 6 hours, similar in length to a standard aurora tour, but with far more of that time spent actively working the camera rather than just waiting and watching.
Photography tour or standard aurora tour: how they compare
| Photography-led tour | Standard aurora tour | |
|---|---|---|
| Who runs it | A working photographer | A driver-guide |
| Camera coaching | Continuous, hands-on | Minimal or none |
| Equipment provided | Often, check the listing | Rarely |
| Typical price per person | Roughly 150–250 EUR | Roughly 100–180 EUR |
| Group size | Usually smaller | Can be larger |
| Best for | Beginners wanting real photos | Anyone wanting to see the sky, photos optional |
| Aurora still guaranteed | No | No |
Prices vary by operator, season and group size — treat the ranges above as a starting point for comparison, not a quote.
What “equipment provided” actually means
This is the detail worth confirming before you pay, because “photography tour” doesn’t automatically mean gear is included. Ask, or read closely, whether the price covers:
- A camera body and lens, or only a tripod for a camera you bring yourself.
- Insurance or a deposit if you damage lent equipment.
- Memory cards, or whether you need to bring your own.
- A way to get your files afterwards — USB transfer, cloud link, or copying to your own device on-site.
Some operators run a bring-your-own-camera model and simply add professional coaching and tripods to what’s otherwise a standard aurora tour. That’s still a legitimate booking for a beginner with their own camera, but it’s a different product from one where a camera is lent, and the price should reflect which one you’re buying. If you’re relying on a phone rather than a camera, see photographing the northern lights on a smartphone for what to expect from that route, with or without a guide.
The coaching itself: what a good photographer actually teaches
The value of these tours isn’t the equipment, it’s the in-field explanation, adjusted to conditions that change through the night rather than delivered once as a generic lecture. A good photography guide will typically walk you through:
- Manual focus at infinity in the dark, which is one of the most common failure points for beginners shooting stars or aurora — covered in more depth in camera settings for auroras.
- Balancing ISO, aperture and shutter speed as the aurora’s brightness changes — a faint, slow-moving band needs a longer exposure than a bright, fast pulse, and settings that worked ten minutes ago may already be wrong.
- Composition with a foreground — a treeline, a person, a frozen lake — rather than sky alone, which is what separates a memorable shot from a technically correct but flat one.
- Avoiding the tripod mistake that ruins otherwise good shots — an unlocked head, a knocked leg, or a tripod set on snow that shifts mid-exposure. This is common enough to have its own write-up: see the forgotten tripod mistake.
What a tour won’t teach you in one evening is the full technical background behind those settings — that’s a longer subject covered separately in guides on how the northern lights actually work and on camera settings generally, rather than something to expect to master in a single guided night out.
After the shoot: editing, sharing and what you actually take home
This is where photography-led tours vary the most between operators. Some build in 20 to 30 minutes at the end of the evening reviewing shots together, deleting the failures, and lightly editing a handful of the best frames — adjusting white balance and contrast rather than heavy retouching. Files are then shared by USB stick, a download link sent the next day, or transferred directly to your phone.
Other tours end when the shooting does: you keep whatever is on your memory card, unedited, and any processing is up to you afterwards. Neither approach is wrong, but they’re different products, and it’s a reasonable question to ask before booking, not after: does the price include any editing or file handoff, or is that an extra?
If editing and finished, shareable images matter more to you than the shooting itself, prioritise tours that explicitly mention a review or export step in their description. If you’re happy to edit your own photos later, or use them straight off the card, the distinction matters less.
What these tours are not
It’s worth being precise about the edges of this category, because the terminology overlaps with other bookings on the site:
- They are not general aurora hunting tours. A standard tour, without a dedicated photographer, still gets you to dark sky and lets you shoot on your own — see aurora hunting guide to Rovaniemi for that broader category.
- They are not snowmobile or dog-sled aurora tours without a photography focus. Those combine an activity with aurora viewing but don’t put a photographer in charge of coaching your camera — covered separately in husky and reindeer sled aurora tours and snowmobile northern lights tours.
- They are not a substitute for a glass igloo stay, where you wait for the aurora from indoor comfort rather than actively shooting outdoors — see glass igloo northern lights if warmth matters more to you than active coaching.
- They are not free. If budget is the priority over coaching, free northern lights viewing spots and walking aurora spots near Rovaniemi cost nothing beyond getting there, but you’re on your own for settings and equipment.
Specific tours to compare
A handful of bookable tours in and around Rovaniemi build photography coaching into an aurora or landscape evening, rather than treating it as an afterthought. They differ in setting, activity and how much of the evening is spent actually shooting.
The an aurora-hunting tour with photography guidance is the most direct match for what this guide describes: a photographer-led drive to dark sky with coaching built into the evening from the first stop. It’s the one to compare against if photography, not a secondary activity, is the point of the night.
For visitors who’d rather combine the coaching with a short hike than sit in a minibus between stops, the Rovaniemi Snowshoeing with a Photography Guide pairs a guided snowshoe route with camera instruction along the way, useful if you also want daytime landscape shots rather than aurora alone.
A step further afield, the Riisitunturi Guided Hike with Photography heads into the Riisitunturi National Park for its snow-laden trees, with a photographer coaching composition on terrain that rewards a longer, more deliberate hike than a roadside aurora stop.
Further north, near Ivalo, the Ivalo Aurora Hunting with Huskies combines dog-sled time with aurora watching in a darker-sky region than Rovaniemi itself, though check whether photography coaching is included or whether the focus is the huskies — the two aren’t always equally weighted on this style of tour.
Before booking any of these, confirm directly with the operator what’s included: camera loan or not, editing or not, and roughly how much of the evening is coaching versus driving. The tour names alone don’t always spell that out.
Managing expectations before you book
The single most useful thing to do before paying for a photography-led tour is to read a description of what your eyes will actually see that night, separate from what a camera captures. Brochure photos are shot with long exposures and often lightly edited; most nights, even a strong aurora looks like a pale, moving grey-green band to the naked eye, not the vivid colour in the marketing image. A good photography guide should explain this honestly rather than let the tour’s own photos set an unrealistic bar.
For the full picture, eye versus camera: what you really see is worth reading before you go, and months everyone skips and shouldn’t helps set expectations around season, since September to October and February to March tend to bring more stable, clearer skies than the cloudier heart of December and January.
Aurora photography tours: frequently asked questions
Do I need my own camera for a photography-led aurora tour?
Not always, but check before booking. Some operators lend a camera body, lens and tripod as part of the price; others expect you to bring your own DSLR or mirrorless camera and only supply the tripod. A handful are bring-your-own-gear only. The tour listing or a quick message to the operator will tell you which model applies.
Will I definitely get good aurora photos on one of these tours?
No. A photographer can improve your odds by choosing a dark, open site and coaching your settings in real time, but nobody controls cloud cover or geomagnetic activity. A guide who promises great photos on a specific night is overselling; a fair one talks about the plan for finding clear sky, not a guarantee of the result.
What’s the difference between a photography tour and a normal aurora hunting tour?
A normal aurora tour drives you to dark sky and gives you time to look and shoot on your own, sometimes with brief pointers from the guide. A photography-led tour puts a working photographer in charge of the evening: they set up tripods, walk you through exposure and focus for the conditions, and often shoot alongside you and share tips shot by shot.
Can a smartphone take usable aurora photos on one of these tours?
Recent smartphones with a dedicated night mode can capture a visible aurora in reasonable conditions, and most guides will help you set that mode up. The results are noisier and less detailed than a camera on a tripod with a long exposure, so if photography is the main reason you’re booking, a lent or borrowed camera will get you a better result.
Do these tours include editing or printing the photos afterwards?
It varies by operator. Some photography-led tours end with a short session reviewing shots on a laptop and exporting a set of edited files to a USB stick or a download link; others simply hand back your memory card as you took it. Ask what’s included in the price before you book if editing matters to you.
Is a photography tour warmer or more comfortable than a regular aurora tour?
Not particularly. You’re still standing still outdoors for long stretches while cameras are set up and exposures run, which is colder than walking. Thermal suits, boots and gloves are usually provided, but dress for standing still in Arctic cold rather than for movement.
Should a complete beginner book a photography-led tour or a photography course instead?
A tour is the better starting point for most visitors: it’s one evening, gear can be provided, and the coaching is hands-on and specific to that night’s sky. A multi-day photography course or workshop suits someone who already owns a camera and wants to leave with a repeatable skill, not just a set of photos from one trip.
How much does a guided aurora photography tour cost compared to a standard aurora tour?
Photography-led tours usually sit above the price of a standard minibus aurora tour, often by 20 to 50 percent, because the group is smaller and a professional photographer, not just a driver-guide, runs the evening. Expect a range roughly from 150 to 250 EUR per person depending on group size, gear included, and whether transport covers a long drive to darker sky.
Northern lights tours on GetYourGuide
Verified deep-linked GetYourGuide tours. Book through these links and we earn a small commission at no cost to you.
GetYourGuide does not provide a product photo for this activity — the image shows the meeting point, photographed by us.